During one night at my parents (where my 3 month old daughter refuses to sleep) I was dangling a bright blue bracelet above her her head. Why was i doing that? I’m not really sure. I was too sleep deprived to think about my bracelet dangling actions, but there must have been some divine intuition because i heard lots of cooing and babbling. Someone got really excited by this bright blue bracelet and went arm flailing happy trying to grab it.
What does a DIY mother do in a moment like that? I’ll tell you what- she thoroughly enjoys the moment then passes the bracelet over to hubby and starts planning; and in my planning i discovered this awesome DIY baby gym.
Fast forward to today. We were snowed in and it was the perfect opportunity to work on this. Montessori toys are simple designs made out of natural materials, but since we could not leave the house we had to use what was available and I’m so glad we did! You will see why.
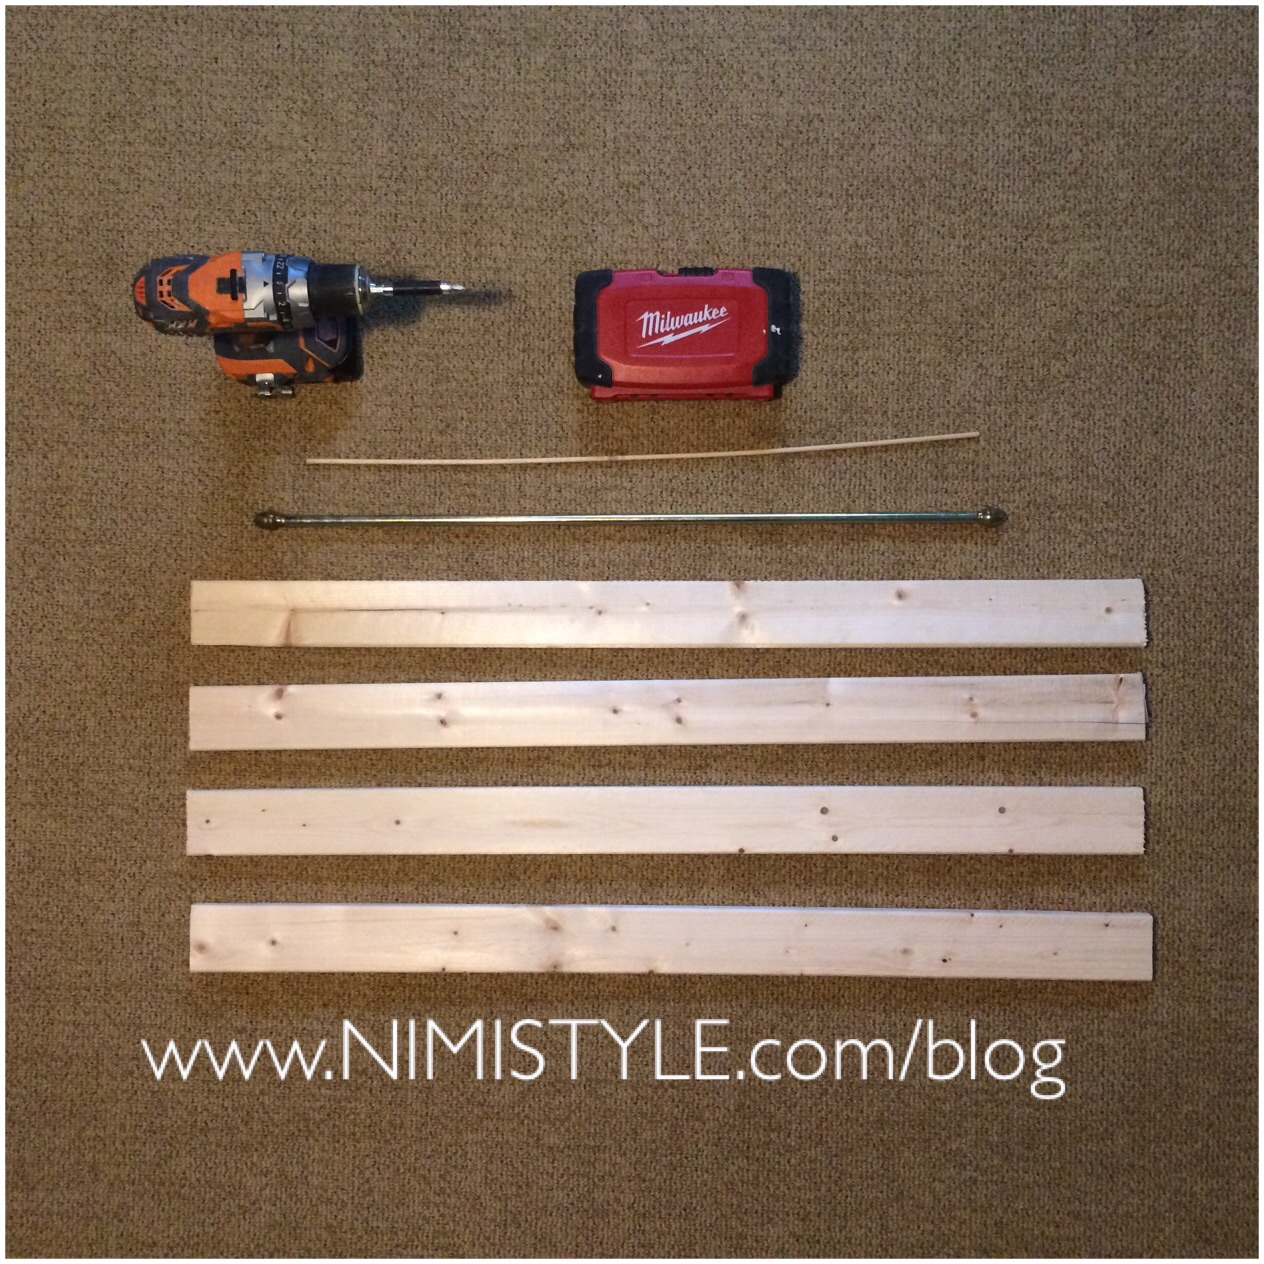
WHAT YOU NEED:
- 4- 1×2-1/2 pieces of equal size wood (35″ in length each)
- 1- Adjustable curtain rod with end caps
- 1- Dowel rod
- Drill
- Spade drill bit
- Ribbon, Scissors, & Glue (not pictured)
- Hand sander (not pictured)
WHAT YOU WILL DO:
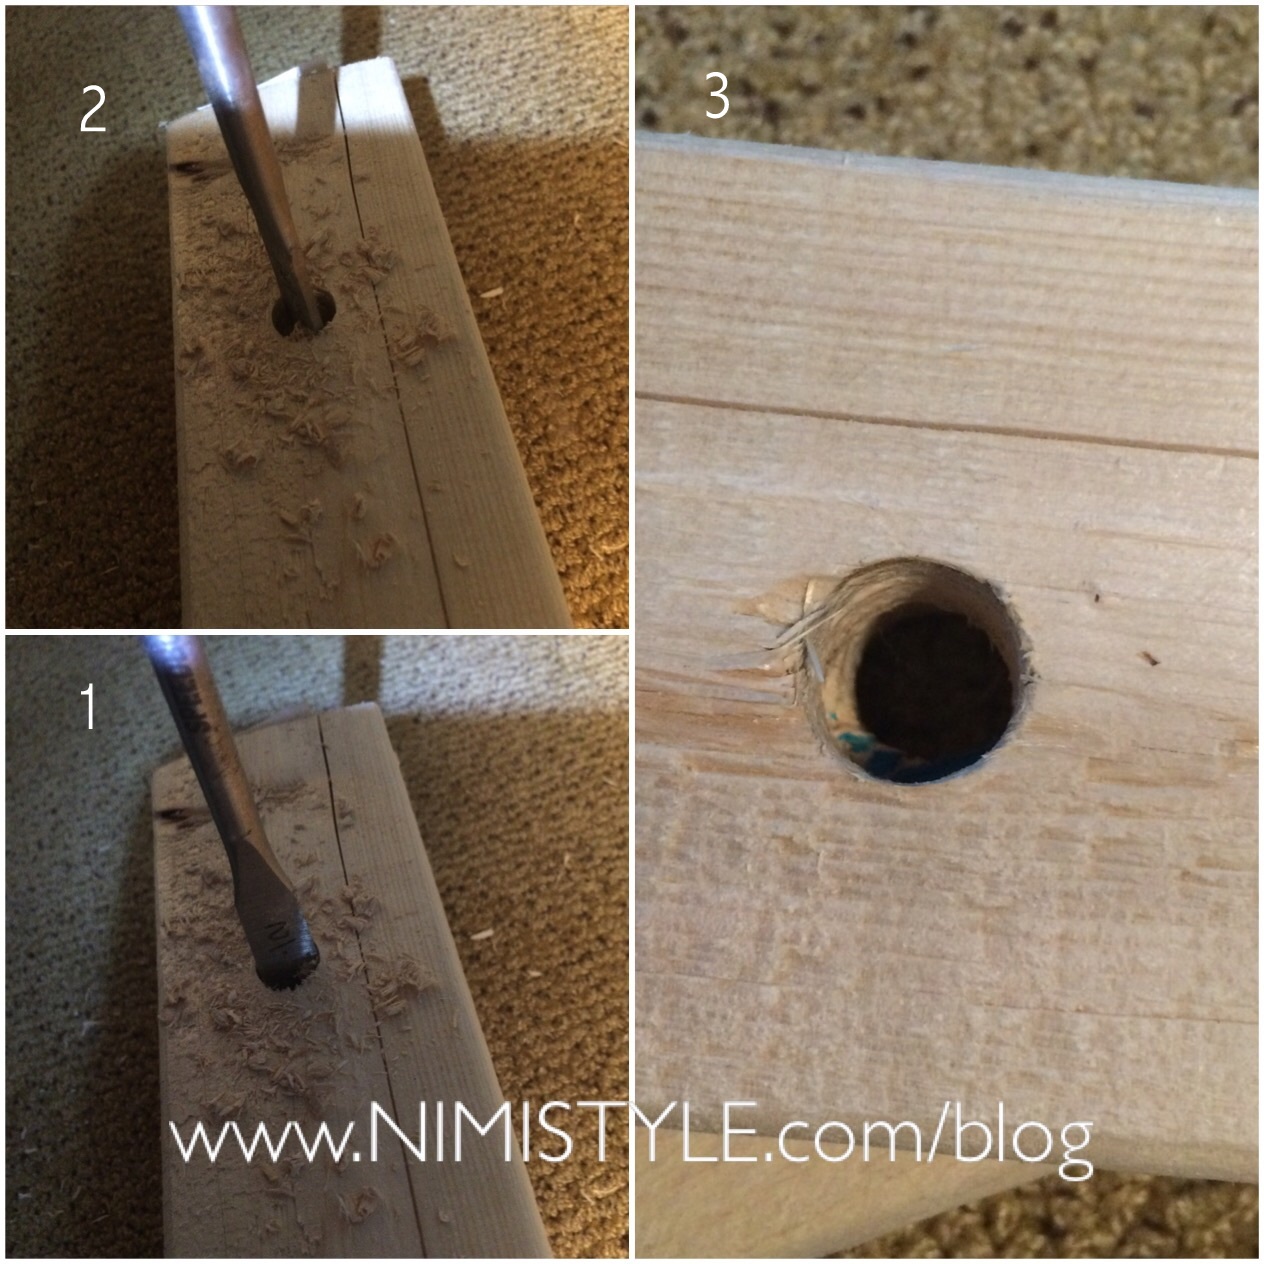
(1) Using your spade bit drill a hole to match the diameter of your curtain rod. Our rod was a little smaller then 1/2″ so we used the 1/2″ bit. Hubby just layered all 4 pieces of wood and then eyeballed about 3 inches down and drilled away. These will be the legs.
(2) Use a hand sander to smooth out any rough areas.
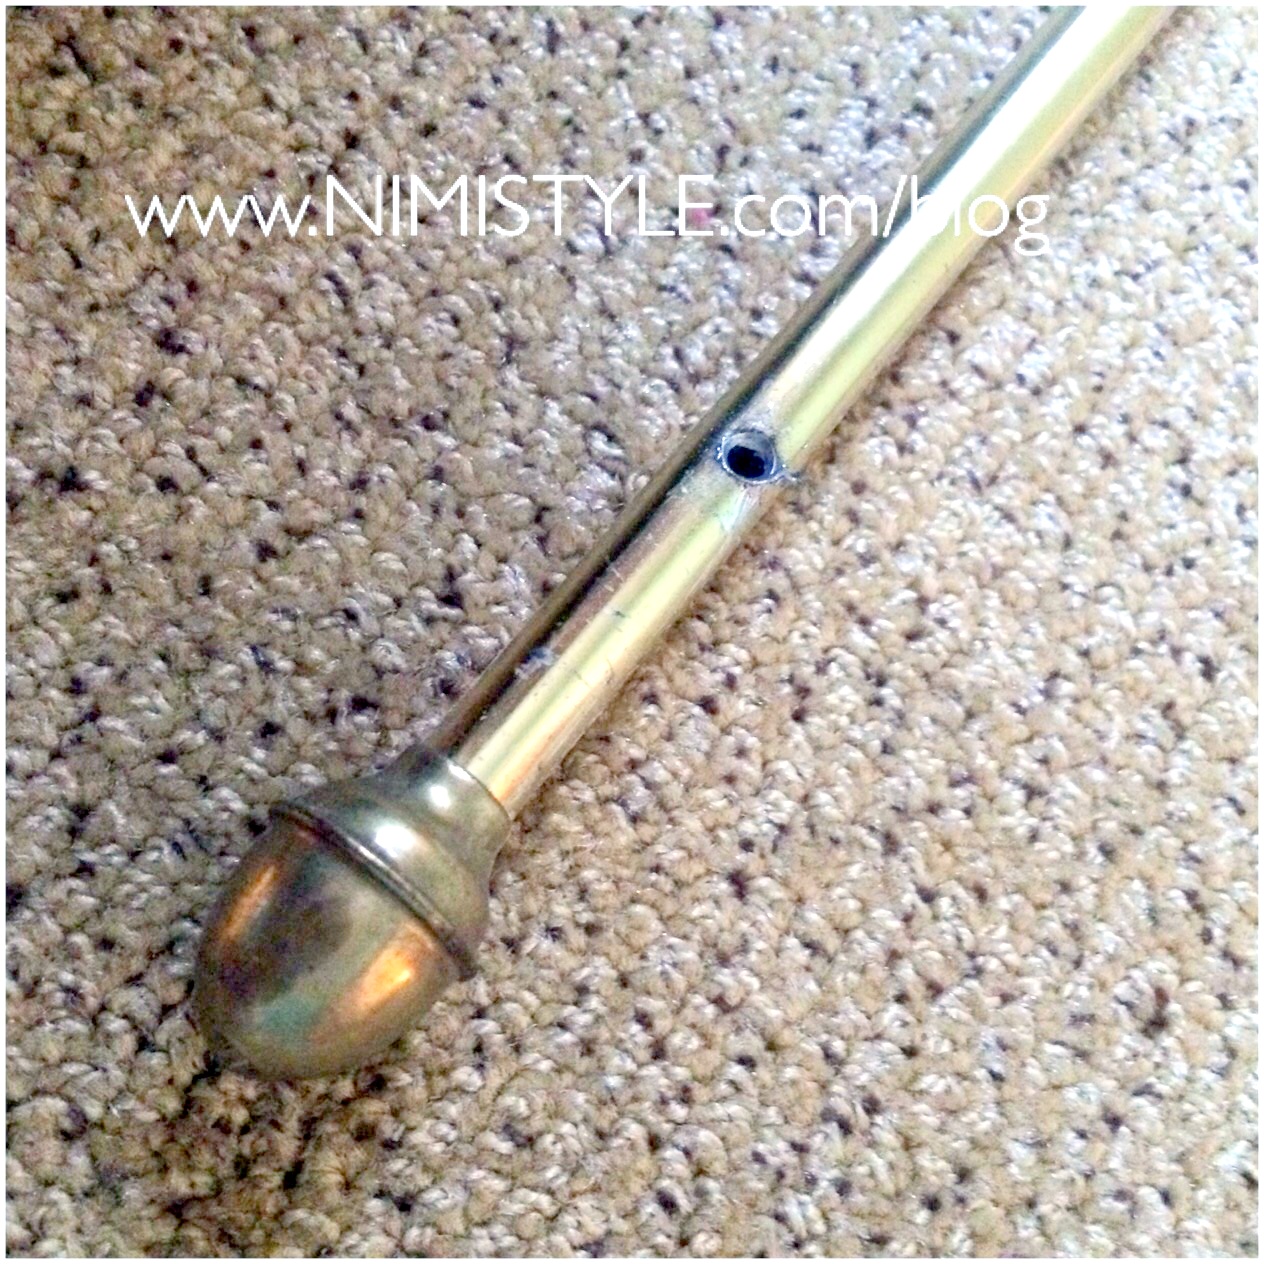
(3) Place your curtain rod into 2 of the legs. Mark how far it goes in. Drill a hole where you marked going all the way through. Do this on both ends of the rod.
(4) Place 2 of the legs at each end of your curtain rod. The end caps will ensure the legs dont slip off.
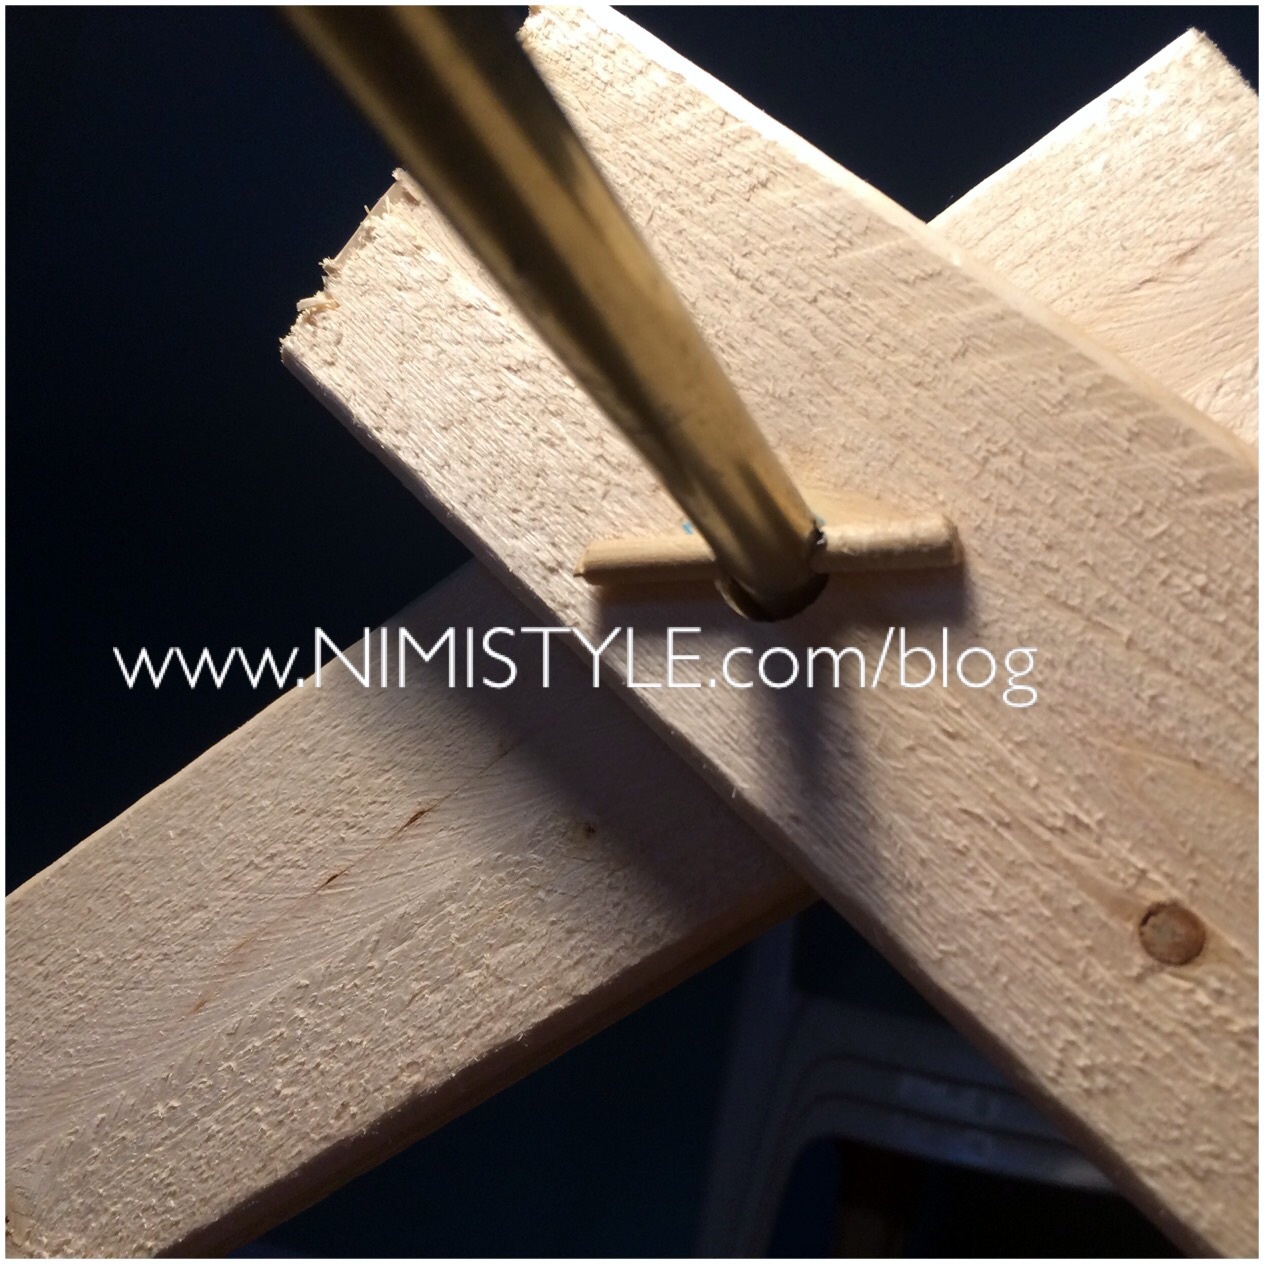
(5) Cut 2 pieces out of your dowel rod about 1-1/2″ each. Add a dab of heavy duty glue onto your dowels and push them into the holes you made in your rod. Between the end caps and these dowels the legs of you gym will not slide across the rod. This will hold it in place.
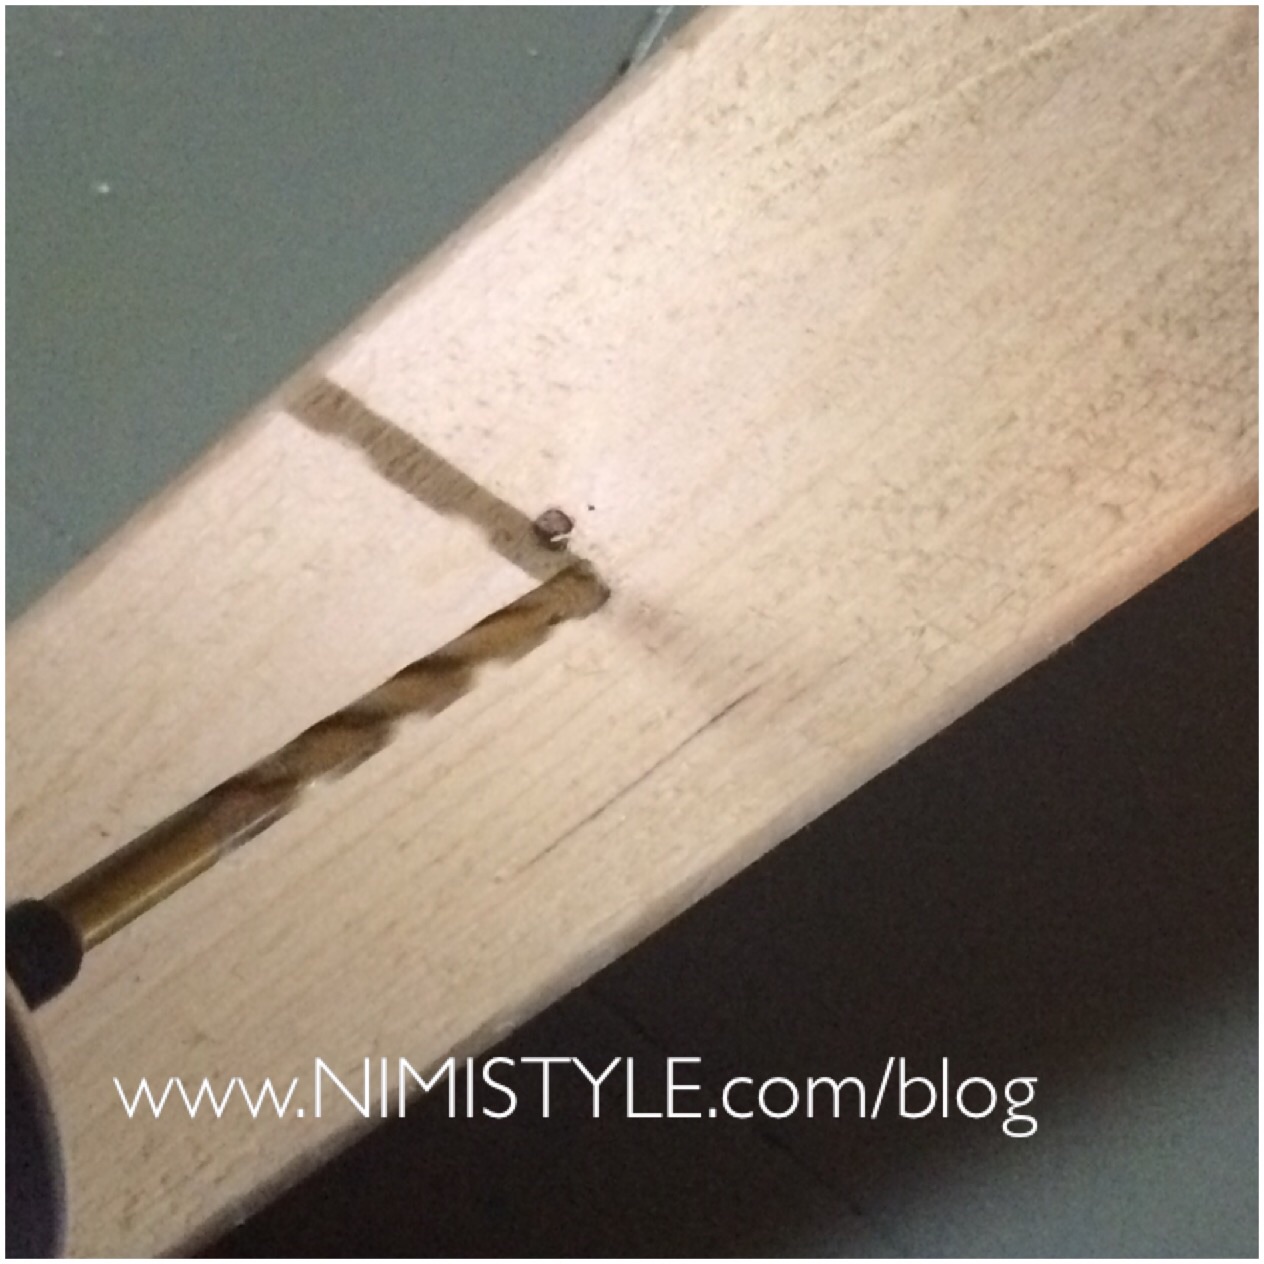
(6) Next we drilled a small hole about 1 foot down from the top of each leg.
(7) Cut two equal lengths of ribbon. The length of the ribbon depends on how much you want your gym to open (this adjusts the height). Place 1 ribbon each into 2 of the neighboring legs and tie. This will ensure the gym doesn’t collapse open while your baby is under. We haven’t placed the ribbons into ours as of yet. It is pretty tight, but will be doing it even before this post is up.
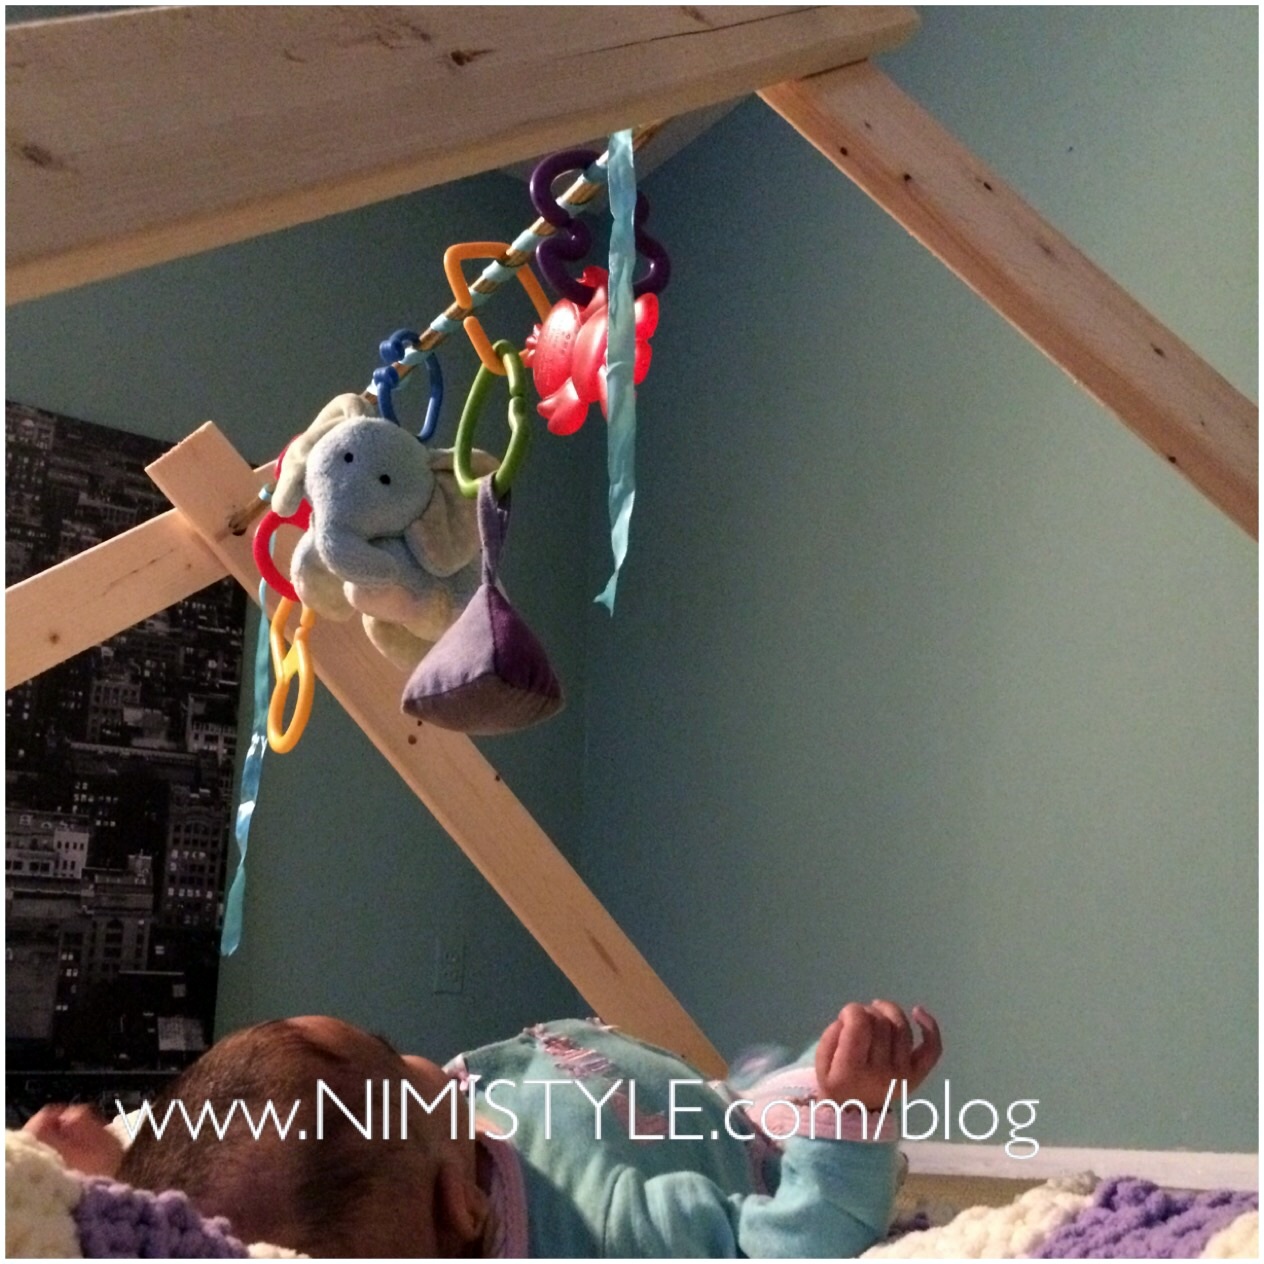
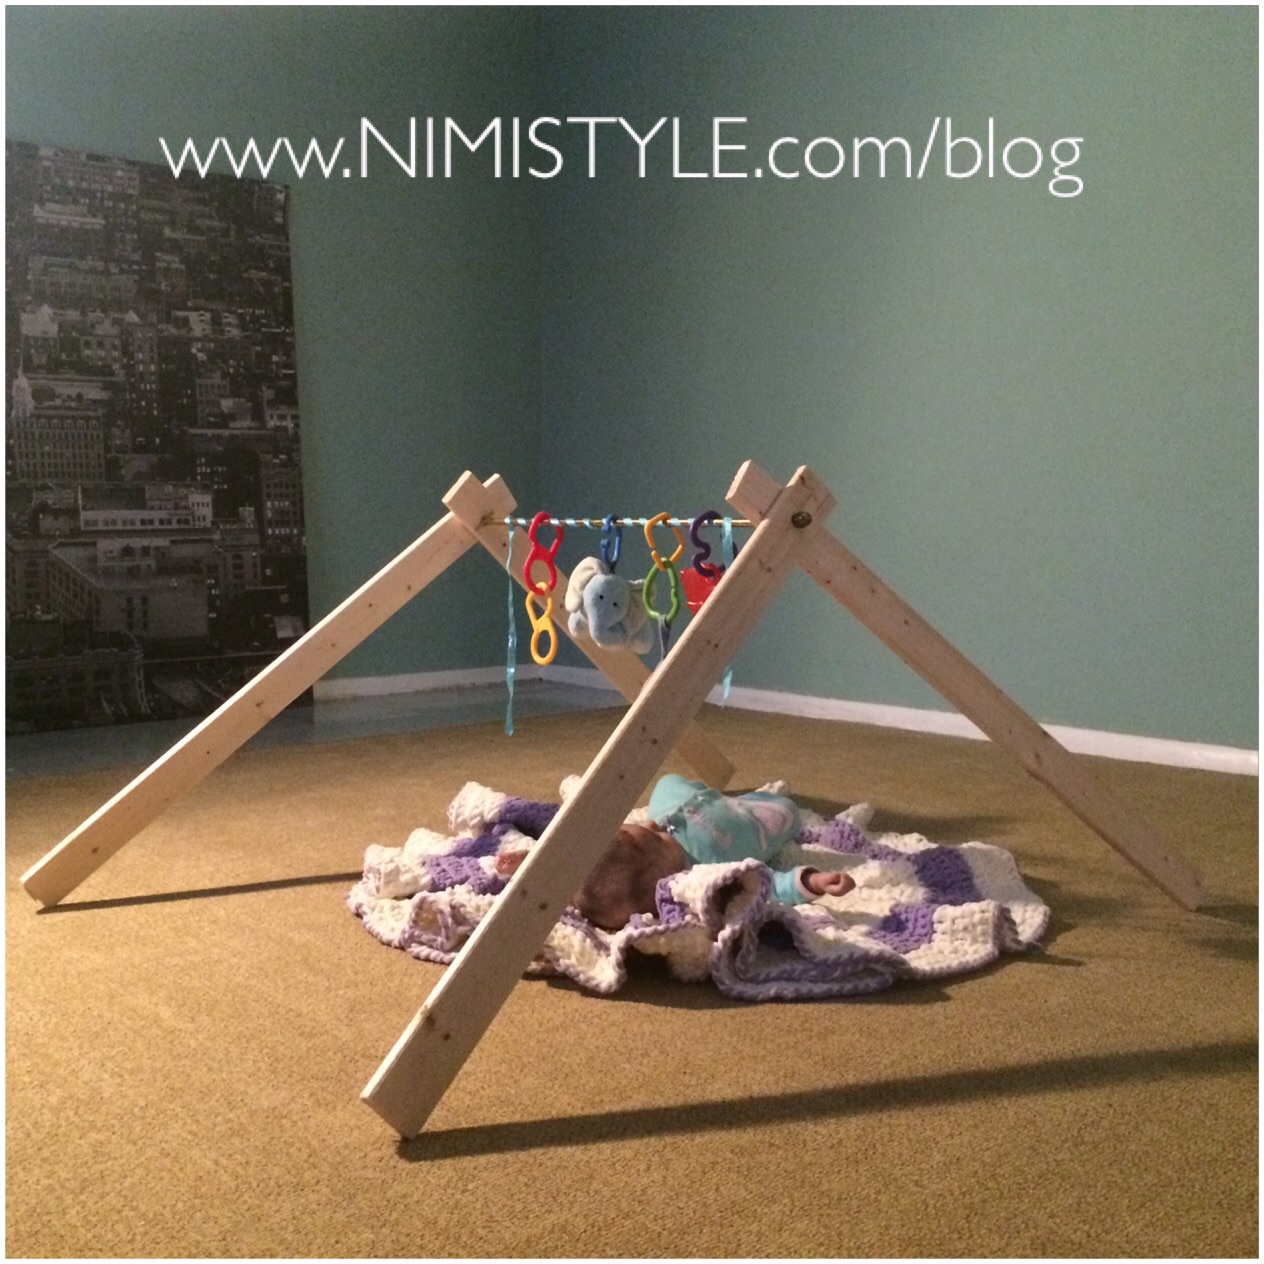
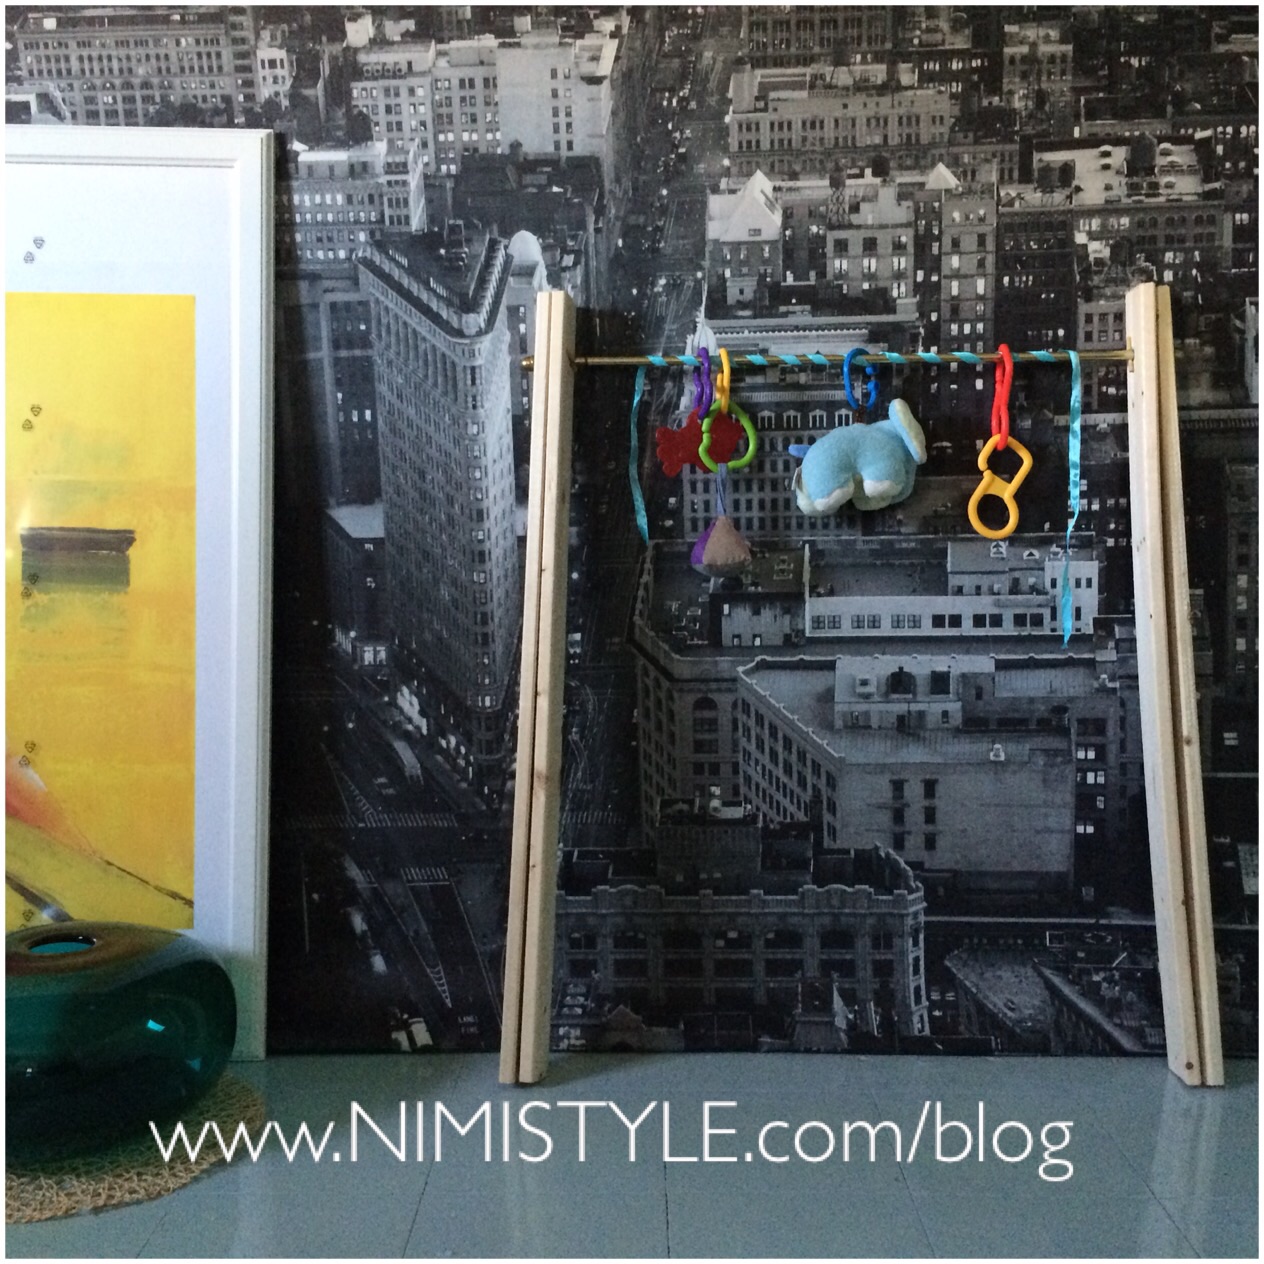
(8) Add toys and watch your baby enjoy!
(9) When your baby is done playing you can fold it and put it away!
Now the reason i was so excited about having to use materials we have at home is because the rod we used is expandable, which means this gym is expandable! We would have never thought of that on our on. It can therefore be used with multiple babies. So who’s down for a play-date? 🙂